SharePoint: Extending the DVWP – Part 18: User-Managed Dropdowns – Loading the Relationship list – Part 1
 Author: Jim Bob Howard
If you’ve been keeping score, last time we set up a relationship list that will relate two dropdown lists to each other in a parent-child relationship so that we can cascade (or limit) the dropdown selection lists, in the child control, based on a selection in the parent.
There are a couple techniques that I know of to simplify loading the relationship data. We have to be deliberate in how we do this with SharePoint because the Title column is required by default. Last time, I listed our options:
- We can make the Title optional (and hide it from view, if desired)
- We can make it optional and create a workflow that concatenates the site columns to make up a unique Title. (Not recommended.)
- We can us Excel to create our entire Country-State Relationships table and paste the entire thing in here.
I’m going with the first option for this article. I will cover the third in the next article.
At a later date, I might tackle the second option in an article, but I’m reluctant to do so because of the way workflows work that will require lots of error checking and comparisons. The workflow could be very helpful once the initial data is loaded and the entry method is changed to a DVWP or standard one-at-a-time entry. I’ll cover that in a future article.
- Make Title optional, by clicking on Settings -> List Settings
- Click on Title under Columns
- Click No for Require that this column contains information under Additional Column Settings
- Click OK
- Click the breadcrumb to return to the datasheet view.
- Open another browser tab or window (Window will make it easier to Alt-Tab between the two), and browse to your States (or other ‘child’) list
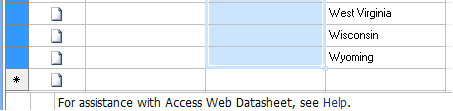
- Select all of the children for one parent (in our case, click on Wyoming; holding the Ctrl and Shift keys on a PC, press the up arrow) and press Ctrl-C to copy the list to the clipboard
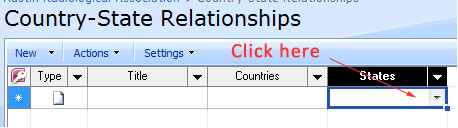
- Toggle to the relationship list and click on the first cell in the child column
- Press Ctrl-V to paste the list into relationship list
- Click on the first parent cell, click the arrow to reveal the dropdown choices, and choose the parent that corresponds to the children just pasted in
- Holding the Ctrl and Shift keys, press the down arrow key to highlight all the cells in this column. Still holding Shift, release Ctrl and press the up arrow to deselect the insert row
- Press Ctrl-D to ‘fill down’ all of the cells in this column with the value in the first cell
- In next cell in the parent column, choose the next parent (Canada, in our case)
- Toggle back to the States list. Select the first child for the next parent (Alberta, in our case), and holding Ctrl and Shift, press the down arrow
- Press Ctrl-C to copy them and toggle back to the relationship list
- Move the cursor to the cell in the insert row below the last child entry (Wyoming, in this example), click once, and press Ctrl-V to paste.
- Press Ctrl-down arrow to move to the bottom of the list. Press the left arrow to move to the parent column. Holding Ctrl and Shift, press the up arrow. (This will select everything from here to the next cell above that contains data.) Press Ctrl-D to fill down again.
- Repeat if you have more parents to enter.
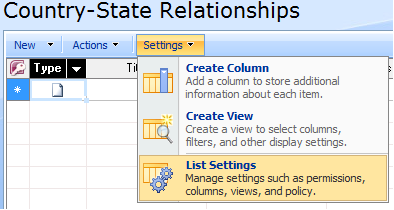
Settings -> List Settings
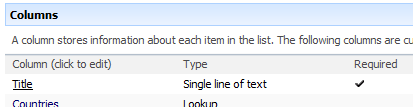
Click the column name to edit it
Set to Optional by setting Required… to ‘No’

Select all of the States that correspond to the USA
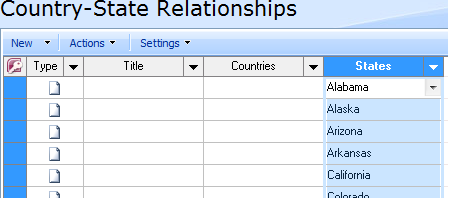
Child columns have been pasted in
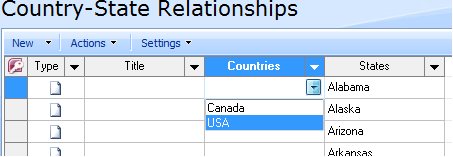
Choose the parent for the first row
Select all of the cells in the parent column, except the last one
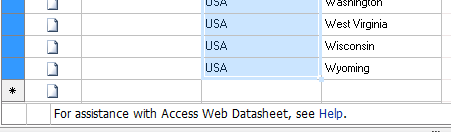
Parent cells filled in
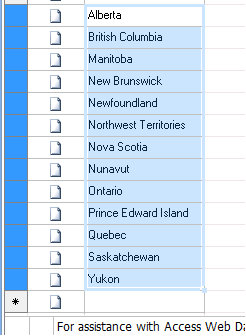
Canadian Provinces selected
We could have also done this using Excel to get the data the way we wanted it, as well as setting the Title with something descriptive. We’ll cover that option next time we continue Extending the DVWP.
Author: Jim Bob Howard
Jim Bob Howard is a web designer / webmaster in the healthcare industry. He has been working with SharePoint since March 2009 and enjoys sharing what he has learned. He is a moderator and frequent contributor to Stump the Panel, and answers SharePoint questions on Twitter (@jbhoward) and via email ([email protected]).
- SharePoint: Extending the DVWP - Part 1: Layout Enhancement - Rearranging Columns - Default and Edit Templates
- SharePoint: Extending the DVWP - Part 2: Layout Enhancement - Rearranging Columns - Insert Template
- SharePoint: Extending the DVWP – Part 3: Getting it All on One Line - DVWP Function Action Links
- SharePoint: Extending the DVWP – Part 4: Turning DVWP Action Links into Buttons
- SharePoint: Extending the DVWP – Part 5: Doing Stuff Before Save on Submit - PreSaveAction()
- SharePoint: Extending the DVWP – Part 6: Examining the Form Action Links
- SharePoint: Extending the DVWP – Part 7: Creating a Form Action Workflow
- SharePoint: Extending the DVWP – Part 8: Creating a Form Action Workflow - The After Math
- SharePoint: Extending the DVWP – Part 9: Oops! Failed Setting Processor Stylesheet
- SharePoint: Extending the DVWP – Part 10: Passing Workflow Variables to a Form Action Workflow
- SharePoint: Extending the DVWP – Part 11: Getting More Form Fields to the Workflow
- SharePoint: Extending the DVWP – Part 12: Adding More Form Fields from the Data
- SharePoint: Extending the DVWP – Part 13: Putting PreSaveAction() to Work – Creating Variables
- SharePoint: Extending the DVWP – Part 14: Putting PreSaveAction() to Work with jQuery
- SharePoint: Extending the DVWP – Part 15: User-Managed Dropdowns with Site Columns
- SharePoint: Extending the DVWP – Part 16: User-Managed Dropdowns - Loading Data
- SharePoint: Extending the DVWP – Part 17: User-Managed Dropdowns – Creating a Relationship list
- SharePoint: Extending the DVWP – Part 18: User-Managed Dropdowns – Loading the Relationship list – Part 1
- SharePoint: Extending the DVWP – Part 19: User-Managed Dropdowns – Loading the Relationship list – Part 2
- SharePoint: Extending the DVWP – Part 20: Cascading Dropdowns - Applying the jQuery
- SharePoint: Extending the DVWP – Part 21: Cascading Dropdowns - Three-tier Cascade
- SharePoint: Extending the DVWP – Part 22: Creating Title Based on Other Fields with jQuery
- SharePoint: Extending the DVWP – Part 23: Creating Title Based on Other Fields with a Workflow
- SharePoint: Extending the DVWP – Part 24: A Note to Readers
- SharePoint: Extending the DVWP – Part 25: Using an Audit Trail by Creating List Items with SPServices
- SharePoint: Extending the DVWP – Part 26: Modifying the Edit Template
- SharePoint: Extending the DVWP – Part 27: Adding an Alternate Edit Template to a DVWP
- SharePoint: Extending the DVWP – Part 28: Massage the Remove Template
- SharePoint: Extending the DVWP – Part 29: Modifying Form Action Workflows on the remove Template
- SharePoint: Extending the DVWP – Part 30: Using EasyTabs with Filtered DVWPs to Make Data Manageable
- SharePoint: Extending the DVWP – Part 31: Filling in Default Data on the insert Template with jQuery
- SharePoint: Extending the DVWP – Part 32: Filling in Default Data on the insert Template with Multiple DVWPs
- SharePoint: Extending the DVWP – Part 33: Modifying Total and Subtotal Row Layouts in DVWP
- SharePoint: Extending the DVWP – Part 34: Using Icons for Form Action Links
- SharePoint: Extending the DVWP – Part 35: Putting it All Together
- SharePoint: Extending the DVWP – Bonus: Fixing the Insert Form Action When "No Matching Items"
- SharePoint: Extending the DVWP – Bonus: Creating a Title Based on Dropdowns with jQuery